How to Build a Pirate Ship Out Of Cardboard
Hey there gang! How’s life treating you lately? You know, there’s an old saying that goes like this: “When life brings you down, go ahead and craft a pirate ship out of a cardboard.” This is a saying that I hold dear and has helped me ride through some very rough times. Who came up with this deep and ingenious saying? Hmmm…let me think now…oh yeah, it was me!
Alright, in all seriousness, crafting does help me get things off my mind a bit. Anyway, I went on a Pirates of the Caribbean marathon session last weekend – saw all four installments and I thought the pirate ships in the movies looked cool. So I tried crafting one out of a cardboard and the end result was pretty good. I figured I’d let you in how to build one yourself. Come, let’s get started!
Alright, in all seriousness, crafting does help me get things off my mind a bit. Anyway, I went on a Pirates of the Caribbean marathon session last weekend – saw all four installments and I thought the pirate ships in the movies looked cool. So I tried crafting one out of a cardboard and the end result was pretty good. I figured I’d let you in how to build one yourself. Come, let’s get started!
Things you’ll need to build the cardboard pirate ship:
Cardboard
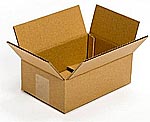
I bought a pack of Pratt PRA0022 corrugated cardboard boxes off Amazon.com (25 cardboard boxes per pack). I didn’t buy the boxes solely for this project mind you. They were bought for other purposes, and I used the leftovers for this cardboard pirate ship project.
A couple of wooden craft sticks
A couple of wooden craft sticks
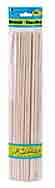
You’ll need the craft sticks to create the pirate ship’s mast so you can hang a flag on it. Every pirate ship needs a flag – yes, even cardboard ones too!
Some glue
Some glue

I’m a fan of Elmer's craft bond fabric and paper glue. I’ve been using the brand since I was in preschool.
Some white acrylic felt
Some white acrylic felt
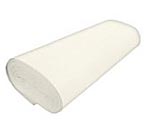
This is for applying details or designs onto the pirate ship’s flag. See below.
Fabric
Fabric
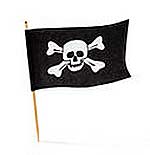
This is for making the pirate ship flag. Preferably you want a black colored fabric because pirate flags typically have black backgrounds. Cut the fabric in the shape of a flag. I cut out some white acrylic felt into the shape of a skull and crossbones and glued them onto the flag.
Some old newspaper
Make sure you cut them into plenty of small strips – enough to cover the cardboard pirate ship.
Some paint
Some old newspaper
Make sure you cut them into plenty of small strips – enough to cover the cardboard pirate ship.
Some paint
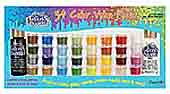
Use whatever art & craft paint you desire. I have a box of DecoArt 34 color set Americana. The set is awesome.
Some varnish
Some varnish
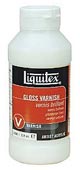
I use Liquitex professional gloss varnish.
Masking tape
Any general purpose masking tape will do.
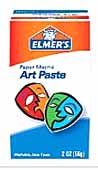
Some paper maché paste
Masking tape
Any general purpose masking tape will do.
Some paper maché paste
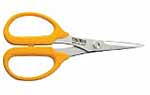
I use OLFA precision smooth edge scissors exclusively.
Directions on how to build a pirate ship out of cardboard
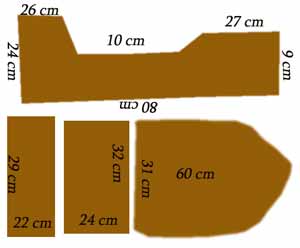
Step 1: Use scissors to cut out the parts of the pirate ship according to the image below. There are 20 parts in total: two side panels, one rear panel, one base, one deck, and 15 circular-shaped parts (each should be roughly 6 cm) for creating the ship’s mast base. The dimensions have been indicated in the image and please note that the measurements aren’t set in stone. You may perform tweaks here and there to ensure all the parts fit together perfectly.
Step 2: Make one large hole in each side of the pirate ship’s side panels, and another hole in the rear panel. Use masking tape to piece these parts together.
Step 3: Use some masking tape to connect the base part with the deck part.
Step 4: Attach the side panels and the rear section to the deck and base parts. Once again, use masking tape to keep them in place.
Step 5: Now, let’s create the pirate ship’s mast base. So to do this, you want make holes right through the middle of all 15 circular-shaped cardboard parts you cut out earlier. Just pile them up and then poke a hole through those circular-shaped parts. Remember not to make too large a hole; otherwise the craft stick will fit in loosely - aim for snug fitting. Secure the circular-shaped parts together with a generous amount of glue. Once done, put some more glue at the bottom and stick them all onto the base of the cardboard pirate ship. Voila! You’ve successfully constructed the mast. If you want to really keep it well in place, try putting on some masking tape.
Step 6: Like I said earlier, the newspaper must be cut into small strips. Done that already? Okay, nice. So begin applying layers upon layers of paper maché over the cardboard ship. Use the paper maché paste generously. The goal of this step is to ensure all the ship’s parts are solidly secured including the circular-shaped base of mast that you put together in the previous step.
Step 7: Allow the paste to dry completely. Next, go grab some paint and what else? Start painting! In this case, I picked a color combination of black and red – I want my cardboard pirate ship to look as menacing as possible!
Step 8: Looks like another drying time is in order. Once the paint is dry, it’s time to paint in some details. You can paint in whatever you want, but preferably it should be pirate related stuff. You could paint a picture of a skull wearing an eye patch – maybe add in some cross bones, or even paint a portrait of Capt. Jack Sparrow who is arguably, the most famous pirate in the world currently due to the huge popularity of the Pirate of the Caribbean film series. After you’ve finished painting in the details you desire, allow for one final drying time.
Step 9: Apply varnish.
Step 10: Grab the fabric that you’ve cut into the shape of a flag, and fold the upper portion just a tiny bit leaving enough space for the second craft stick to go through (the first stick was used to create the ship’s mast earlier, remember?). Now, you can either secure the folded edge using some masking tape or sew it. The former is quicker, but doesn’t look appealing, while sewing makes the flag look real nice, it might take a bit of time to do, especially if you’re aren’t all that good at sewing. The choice is yours, though I’d say sewing is the best option. Not only it looks better, it is more secure as well. Next, poke a hole in the middle section of the fabric and put a string through it. Now you can tie the flag to the cardboard ship’s mast.
And that is how you build a pirate ship out of cardboard ladies and gentlemen. Hope you find this tutorial helpful and please have fun with this project. I wish you all the best of luck!
