Lathe, Woodturning and Cutting Wood for Playhouse Building
Even though it is very clear that wood is actually spun in the wood lathe and after that, shaped with assorted hand tools, it’s considerably less evident the way to mount the actual wood onto the wood to begin with. A little bit of observation in addition to common sense is capable of turning this into a simple and risk-free operation.
Lathe and Woodturning Techniques
Wood is connected to the lathe either in a faceplate or spindle inclination. Spindle turning signifies the grain from the wood is going to run parallel to the floor while faceplate turning suggests the grain runs vertical with respect to the floor.
Although there may be variations for this concept, the novice is recommended to adhere to the scheme until enough practice is acquired to alter it with safety. Chair legs and also rungs are nearly always spun in spindle orientation with regard to factors of strength. The actual parts that join the legs with each other are usually referred to as spindles, hence the usage of the phrase in wood-turning.
Although there may be variations for this concept, the novice is recommended to adhere to the scheme until enough practice is acquired to alter it with safety. Chair legs and also rungs are nearly always spun in spindle orientation with regard to factors of strength. The actual parts that join the legs with each other are usually referred to as spindles, hence the usage of the phrase in wood-turning.
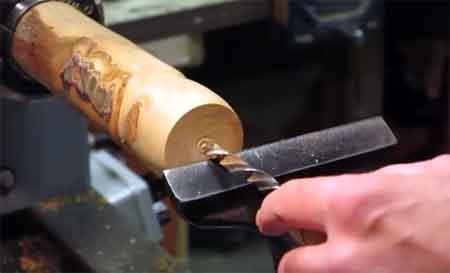
The majority of wood lathes include a spur center with the head stock plus a tail center with the tail stock. Each one of these consists of a center point. A lot of tail centers have got ball-bearings and turn freely. Spur centers are typically encompassed by 2, 3, or maybe more spurs that work together with the solid wood. Spindle stock will be mounted in between these centers.
Make sure they will be seated so the spurs engage the actual wood making it turn. Every once in a while even though it’s turning, tighten up the tail stock to help keep the spurs operating. They’ll attempt to bore their way directly into the wood somewhat similar to a drill bit.
Once again, the majority of wood lathes will include a faceplate. Just like spur and tail centers, they’re also easily obtainable from a variety of aftermarket vendors. Simply acquire one that matches the threads in your lathe. The greater the portion of wood which is to be turned, the greater the faceplate which may be needed. Even so, it’s rare for the majority of home wood lathes to need a faceplate bigger than 6 inches.
Face plates are employed to turn items such as hollow forms, vases, platters or bowls. They will be mounted into the solid wood with screws. Self-tapping metal screws tend to be advised. These have deep threads that will hold the work effectively and are extremely strong.
Screws that enable the threads to move three quarter inches deep are more than enough for the majority of turning. Make sure that the particular wood surface that the faceplate connects to if flat. This will give a lot of holding power to the faceplate.
Although there are additional methods of mounting the wood such as four jaw chucks, glue blocks etc. I feel that face plates will allow the beginning turner to attach wood in the lathe for a large variety of projects.
Cutting Wood
Tri-Square, Scratch Awl, Circular Saw. Do any of these sound familiar to you? If they do, you probably have already been exposed to the wonderful world of woodworking. If not, then you are in for a treat. There is absolutely nothing more satisfying than making something out of wood, especially a large playhouse in the shape of a pirate ship.
It’s just not enough to want to make beautiful playhouses out of wood, there are certain woodworking techniques that any woodworker needs to know about. First, unless you are extremely lucky, nearly every piece of wood you get your hands on will be too big. This means you will have to cut it to make it the right size.
It’s just not enough to want to make beautiful playhouses out of wood, there are certain woodworking techniques that any woodworker needs to know about. First, unless you are extremely lucky, nearly every piece of wood you get your hands on will be too big. This means you will have to cut it to make it the right size.
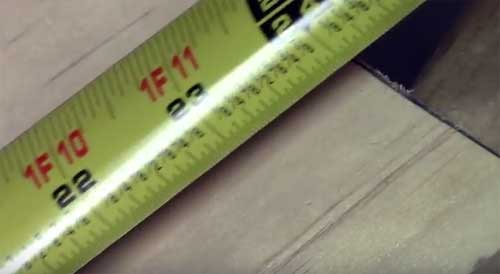
One of the most basic techniques you need to know is how to cut wood. There is an old phrase out there that states, “Measure twice, cut once.” This is more than just a phrase. Do measure twice or even three times. If it is more than just a few feet from where you take the measurement to the place you will be marking the board to be cut, write down the measurement.
Use your scratch awl or a pencil to mark the length you want the board to be cut. A pencil can be erased and can then be stained or painted over. Never use a pen. Pen marks cannot be erased and often show through any treatment.
Now make a line across the board that indicates the final length of the board. Use your tri-square to keep the line straight as you mark it with a pencil or awl. Now you are ready for your circular saw. The last technique or tip here is when cutting the board, professional carpenters always specify, “Save the line.” or “Cut the line.”
Save the line means to cut right next to the line so that when the board has been cut the line remains on the board. Cut the line means to run the saw blade so that the line is just cut off which makes the board about one-half the blades width shorter than the measurement. Always take that into consideration when you make your measurement for assembling your child’s playhouse.
.
