The Process of Designing and Tooling a Pirate Playhouse Ship Project
It should be said at the outset that there are several ways to approach the designing and tooling of the project of building a pirate ship playhouse, or any other type of playhouse for that matter. Once the idea has been conceived, get the main points down on paper.
These fleeting thoughts need not be labored over, nor do they in any way have to resemble finished blueprints. The objective for marking down the salient features of the playhouse is to work out the features and intended function of the playhouse.
These fleeting thoughts need not be labored over, nor do they in any way have to resemble finished blueprints. The objective for marking down the salient features of the playhouse is to work out the features and intended function of the playhouse.
Does the pirate ship playhouse possess a movable wheel, create noises or musical sounds? What is a workable scale? And, equally important, how do you initially see it being put together?
Try to imagine an exploded view of the pirate ship playhouse as I have attempted to portray in the projects illustrated in my sketchbook. This can be a very important element in visualizing the overall appearance the playhouse is to have. Don't fret over the specific types of wood to be used at this point. That pleasurable aspect of wood crafting can come later.
Once a workable plan is noted, proceed to make further notes on the construction as they come to mind. I have found that making a rapid visualization of the playhouse on a large sheet of paper helps make some of the unintentional errors and problems all the more glaring.
An outline of the way I plan to proceed in making the playhouse then follows. All thoughts, half-baked or thought through, are made on this large sheet. Space is reserved on the plan for itemizing tools and other necessary materials.
A place for wood selection is also set aside. This part of the planning is followed by a search for appropriate wood presently on hand as opposed to going out and purchasing different species to offset the wood I do not have.
Making a Pattern
Once you have thought the project through and made notes, rework your drawing until it suits you. Then make drawings of each view of the pirate ship playhouse to be used as patterns for cutting the wood (i.e., top, bottom, side, front, back, as required).
You can draw these patterns the exact size you want the finished product to be, or do them in any convenient size and then enlarge or reduce them to the finished size by one of the following methods:
THE GRID METHOD
This is the classic method of sketching a pattern. A grid is first drawn on a piece of paper or on the original pattern. (If drawn on a separate sheet, it is then laid on top of the pattern.) A similar grid, scaled to suit the final size desired, is drawn on another sheet of paper.
The places where major outlines of the original pattern intersect lines of the overlaid grid are noted and then marked on the second grid at the same relative points. Sketching out the idea then becomes a fairly simple matter of connecting the marked points with short sketch lines.
THE SLIDE PROJECTION METHOD
Using slide film, photograph the original pattern sketches. Process the film and then project the slide on a wall to which you have taped a large sheet of paper. Move the projector closer or further away until the projected image is the size you want. Trace the major lines of the form on the paper.
THE OPAQUE PROJECTOR METHOD
An overhead or opaque projector is used to enlarge the sketch and to project the new size on a sheet of paper. Overhead projectors can be rented from sources such as camera stores and artist-supply companies. Some shops or public libraries will make them available for a nominal charge.
Transferring the Pattern Onto the Wood
Rub powdered graphite on the back of the pattern pieces and lay the paper over the wood's surface. Retrace the lines on the paper, and, in effect, a carbon-paper-type of tracing is made onto the wood. If the pieces are quite simple, you can transfer the measurements to the wood and mark your cutting lines without the need for paper patterns.
Making a Model
On occasion, I have found it very helpful to make a small or full-scale model or prototype of the pirate ship playhouse to check to see if it does what I expect it to do. This way, if the playhouse doesn't work, looks awkward, or is less than satisfactory in some way, then all that is wasted is scrap material.
In the long run, I find this procedure to be more fruitful. Initially, starting to make the pirate ship playhouse with the more precious material might be intimidating to the novice, and even to the more experienced craftsman.
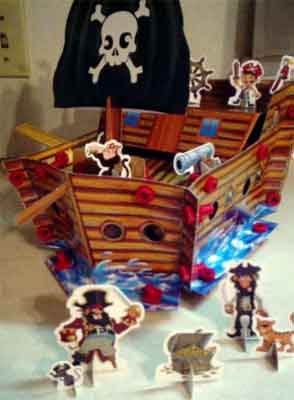
This may also be the time when you discover some aspect of the playhouse that did not show itself during the preliminary stages of thinking and drawing. For example, the wooden pirate ship playhouse pictured on the front page of this website was originally conceived without the small, free-rolling ship wheel that it now has.
The wheel came about only as an afterthought when it occurred to me that a wheel attached to the deck of the pirate play ship would make the playhouse look fairly realistic, and would a dose of interactive play element for the kids.
This is also the time to test out the pirate ship playhouse. Mind you, I feel no chagrin when it comes time to test a playhouse, even if it is meant for a younger, smaller person. Test it thoroughly and then make necessary adjustments to improve the overall mechanics of how it moves, clicks, spins, or performs any number of intended functions.
In the long run, I find this procedure to be more fruitful. Initially, starting to make the pirate ship playhouse with the more precious material might be intimidating to the novice, and even to the more experienced craftsman.
This may also be the time when you discover some aspect of the playhouse that did not show itself during the preliminary stages of thinking and drawing. For example, the wooden pirate ship playhouse pictured on the front page of this website was originally conceived without the small, free-rolling ship wheel that it now has.
The wheel came about only as an afterthought when it occurred to me that a wheel attached to the deck of the pirate play ship would make the playhouse look fairly realistic, and would a dose of interactive play element for the kids.
This is also the time to test out the pirate ship playhouse. Mind you, I feel no chagrin when it comes time to test a playhouse, even if it is meant for a younger, smaller person. Test it thoroughly and then make necessary adjustments to improve the overall mechanics of how it moves, clicks, spins, or performs any number of intended functions.
